Retubing your ear mould
Information for patients from the Audiology Department
The following instructions are for patients who are retubing their own ear mould. If you have any questions, please contact the Audiology Department.
Your ear mould comes with a tube in place. This tube connects the ear mould to your hearing aid.
You need to replace this tube every 4 to 6 months, as:
the tube hardens and discolours over time, reducing the quality of the sound travelling through it; and
wax can also block the tube, and replacing the tube may be the only way to clear the wax completely.
If you are able to retube your own ear mould, please ask the Audiology Department for some replacement tubing.
To retube your ear mould you will need:
scissors
pliers, and
replacement tubing.
To retube your ear mould, please follow the seven steps below.
-
 Step 1: Remove the old existing tubing with your hand or pliers. Keep the removed tubing to use for sizing later on.
 -
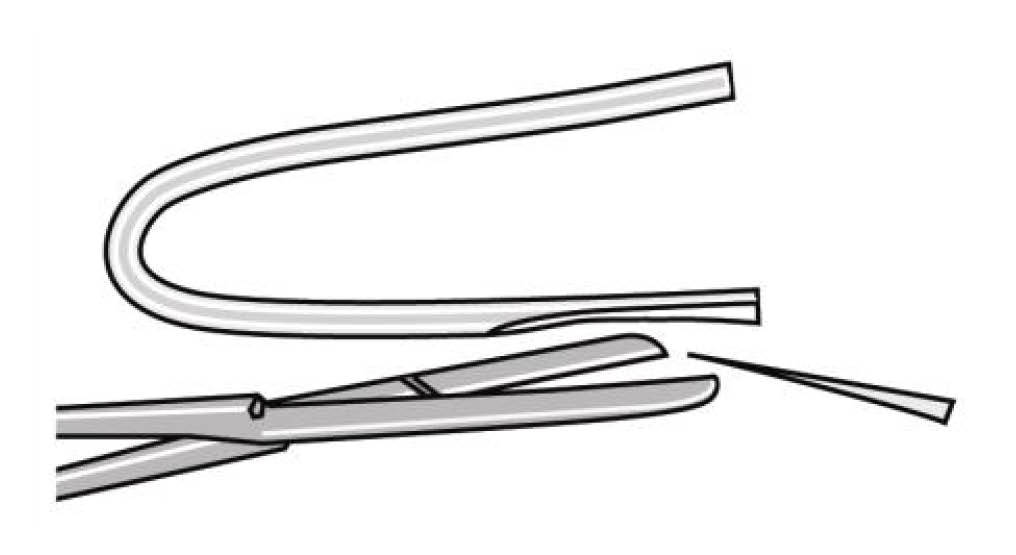 Step 2: Use the replacement tubing, and carefully taper the edge of one side using a pair of scissors. Do not cut too close to the bend.
 -
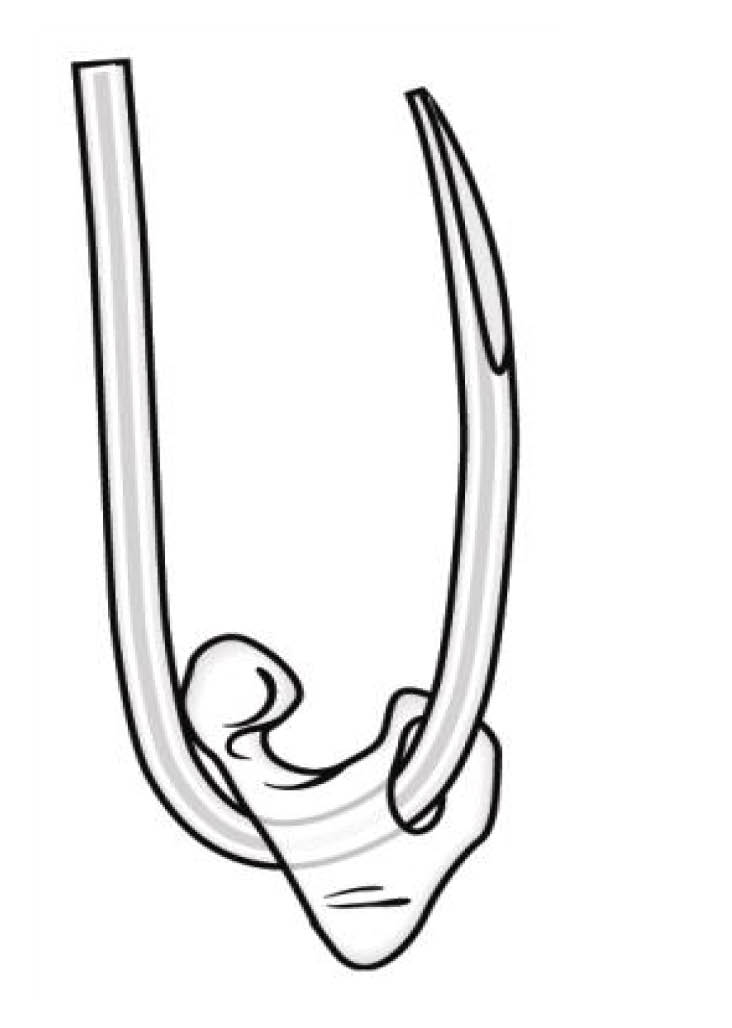
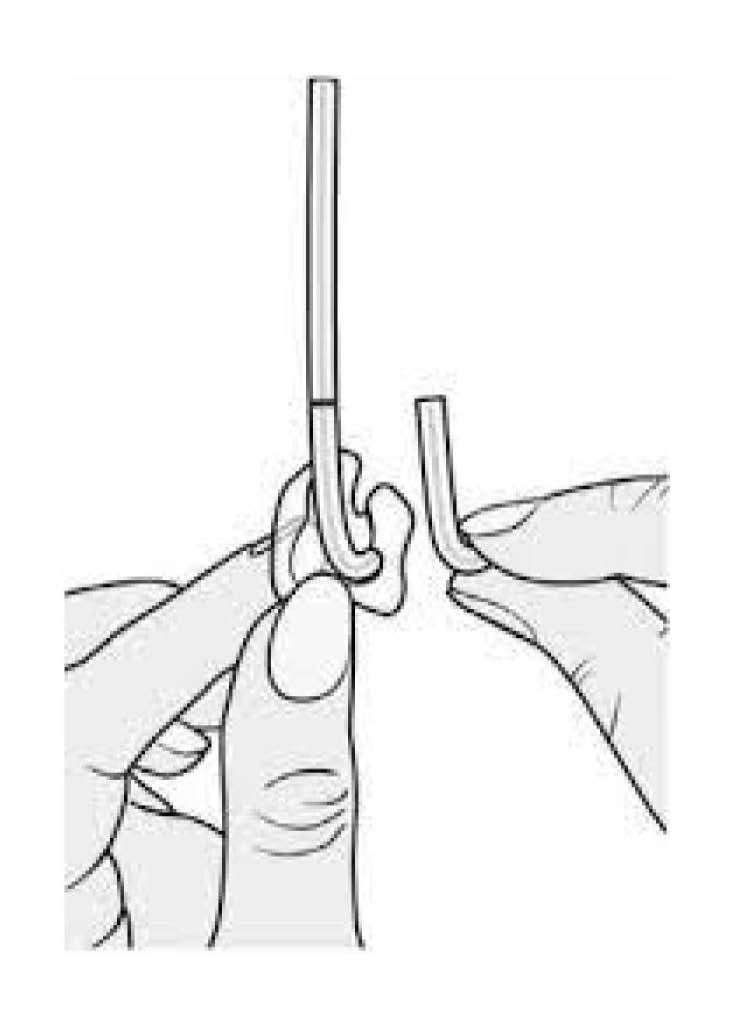
 Step 3: Thread the tapered tube into your ear mould.
-
 Step 4: Pull the tubing through your ear mould, so the remaining tubing is facing upwards.
 -
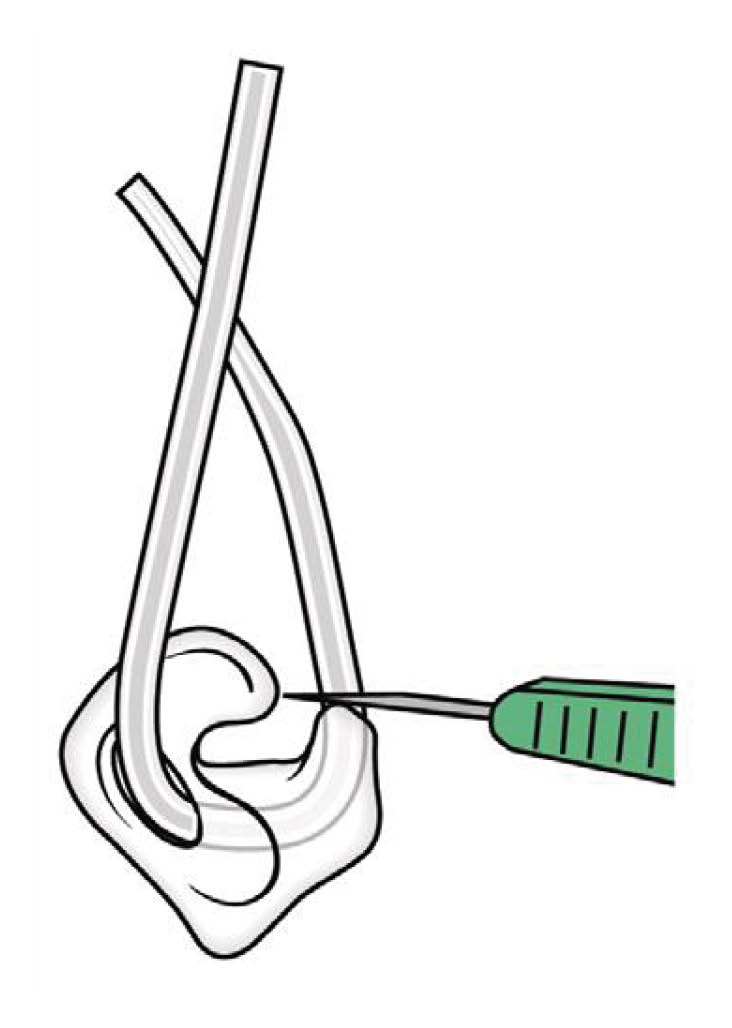 Step 5: Use a sharp pair of scissors, and carefully cut the tapered tubing flush with the end.
 -
 Step 6: Use the removed tubing from step 1 as a guide to cut the new tubing to your exact and preferred length. Carefully cut it at the same length.
 -
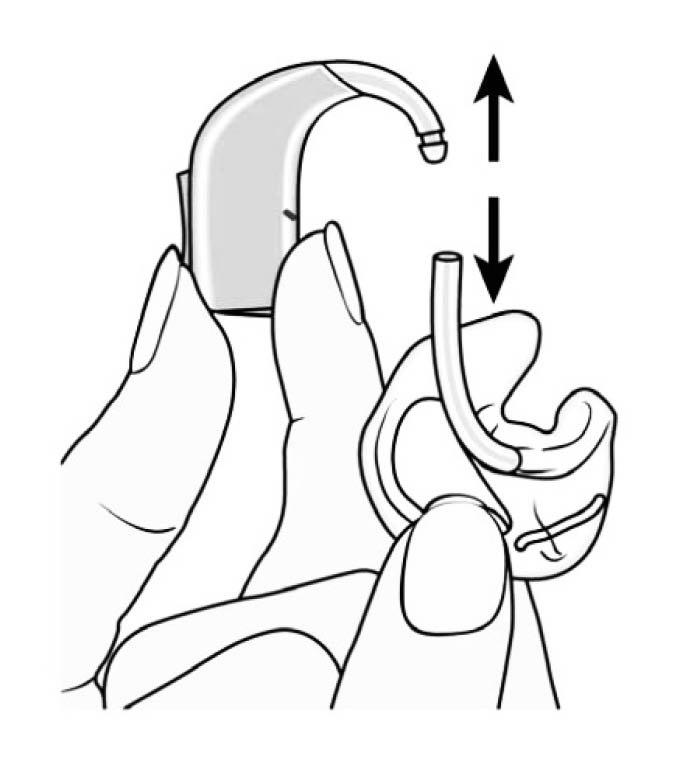
 Step 7: Reattach your hearing aid.
If you have any problems or issues fitting your new ear mould, please contact the Audiology Department.
Audiology Department
Telephone: 01227 864252
Lines are open 10am to 12 noon, and 2pm to 4pm
Email