Mallet finger injury
Information for patients from the East Kent Hand Service
This leaflet provides general information about mallet finger injuries to the fingers and thumb. It is not a substitute for your doctor’s advice.
What is a mallet injury?
Mallet injury is an injury to the end joint of your finger / thumb, which means that you are not able to straighten the tip by itself (although you may still be able to push the joint straight with your other hand). Your finger adopts a bent position. This happens when either the tendon that straightens the tip is torn or pulled away from the bone, or a fracture occurs to the bone where the tendon attaches (see diagrams below).
If your injury is not corrected, the tendon will not heal and you will not be able to straighten the tip of that finger / thumb again.

How is it diagnosed?
Usually a mallet injury is diagnosed by looking and feeling your finger. Occasionally, an x-ray is taken to see if the bone has been damaged.
What are the symptoms?
Symptoms include:
pain
swelling over the end joint of your finger
the end of your finger lies in a bent position; or
you are not able to hold your finger straight at the end joint.
How is mallet injury treated?
Most mallet injuries are treated with a splint, which holds the tip of your finger straight.
For injuries where there is a fracture, called a bony mallet injury, a splint is worn for six weeks.
For injuries where the tendon has been pulled off the bone, called a soft tissue mallet injury, a splint is worn for eight weeks.
Your doctor, nurse, or therapist will advise you which type of injury you have.
Whilst wearing the splint it is important to continue using your hand normally, and not let your other finger joints become stiff. The splint must be worn at all times, both during the day and at night. It should only be removed for cleaning. While cleaning it is important not to let your finger bend, as it may slow down your healing and affect how well your treatment works.
How do I look after my splint?
Your splint will either be a ready-made splint or one made for you by your hand therapist. You will need to safely remove and reapply your splint from time to time, to clean / dry your finger during your rehabilitation. To remove your splint you need to remove the tape and splint without leaving the tip of your finger unsupported. This is best done with your finger resting flat on a table.
Pre-taping your finger

Applying a ready-made splint
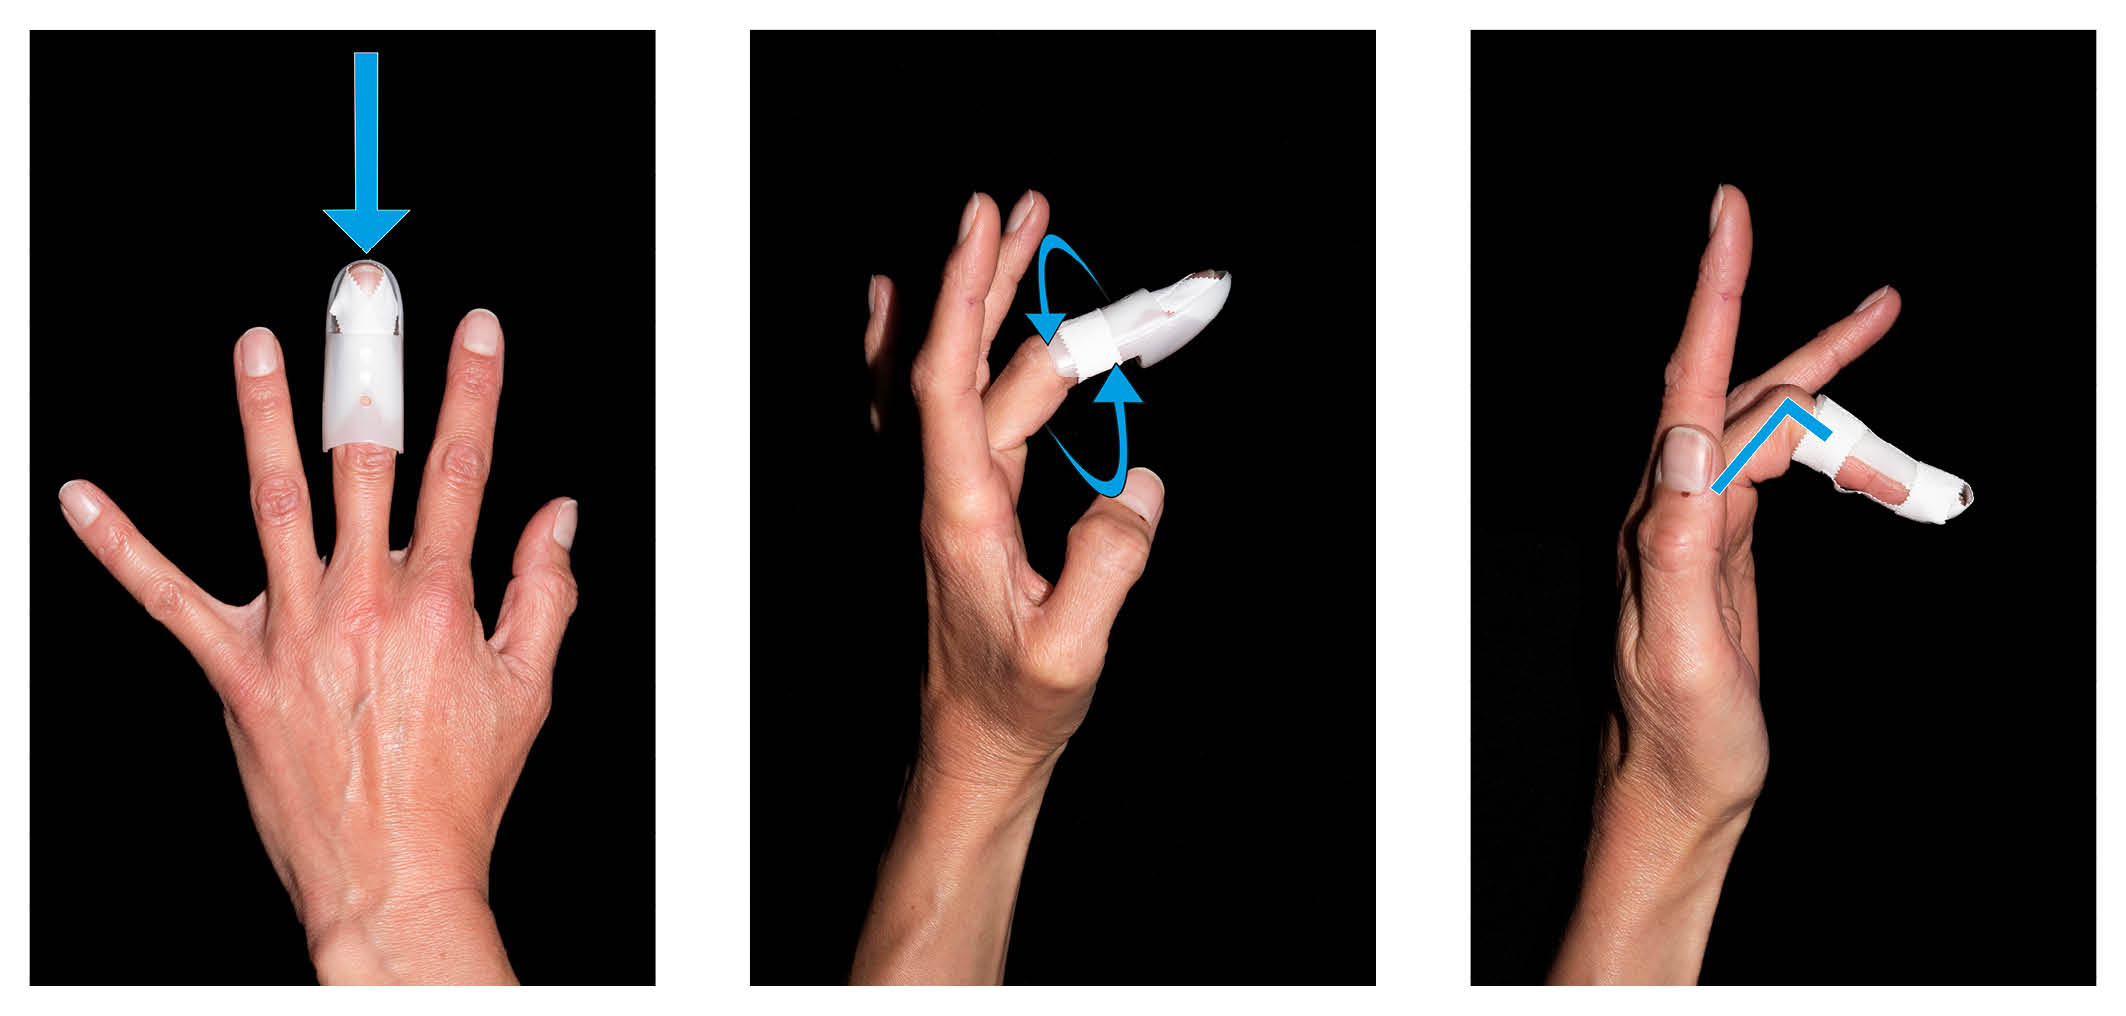
Applying a fabricated dorsal splint
Your hand therapist may make and fit an individual splint that is fitted to you in clinic.
.jpg)
With your finger pre-taped in place, place the splint on the top of your finger so the end of your finger is level with the end of the splint. Using one piece of tape, secure the splint onto your finger as shown.
-1728397126.jpg)
.jpg)
After six to eight weeks gradually stop using the splint, wearing it at night and at risk times (such as when lifting a heavy item) for another month.
How should I care for my finger and splint?
At least once a day you should remove the tape from the splint, taking it off to wash your finger and the splint. Remember the end joint of your finger must not bend.
Once dry, reapply the splint following the instructions above.
What problems can happen with splinting?
Swelling in your finger is likely to change regularly (both up and down) causing the splint to be either too loose and not supporting your finger, or too tight and uncomfortable. In both of these cases the splint should be altered or changed.
When you take the splint off for washing, check your finger for red areas where the splint may be rubbing. Occasionally, the tape may cause some irritation to your skin. If this happens, we recommend changing the tape to micropore (paper style tape) available at most chemists.
What should I do if my splint becomes loose or painful?
If this happens, contact the department who fitted your splint. You may need a different size or a re-mould of your custom made splint.
What are the risks and possible complications?
Occasionally you may be left with a slight loss of the ability to straighten your finger-tip fully and slight stiffness at the end joint of your finger, compared with your other fingers.
Redness and tenderness of the skin on top of the end joint are common for three to four months after your injury, but this usually settles with time. Contact the department where your splint was fitted if this becomes a problem.
Occasionally stiffness may happen in your fingers. This is usually short-term and only occasionally needs therapy.
Compared to non-smokers, smokers are more likely to have complications in tissue healing and infections after injuries or surgery. For free friendly support and medication to help you stop smoking, contact One You Kent.
One You Kent
Telephone: 0300 123 1220
Email
Further information
If you have any questions or problems regarding your finger or splint, please contact your hand therapist.
Exercises after your splint has been removed
Once your therapist has checked your healing bone or tendon at either six or eight weeks, you will need to complete some careful exercises to increase the movement of your finger.
You will need to take the splint off your finger to do the exercises shown below.
Please complete the following exercises four times a day. And complete each exercise five times.
-
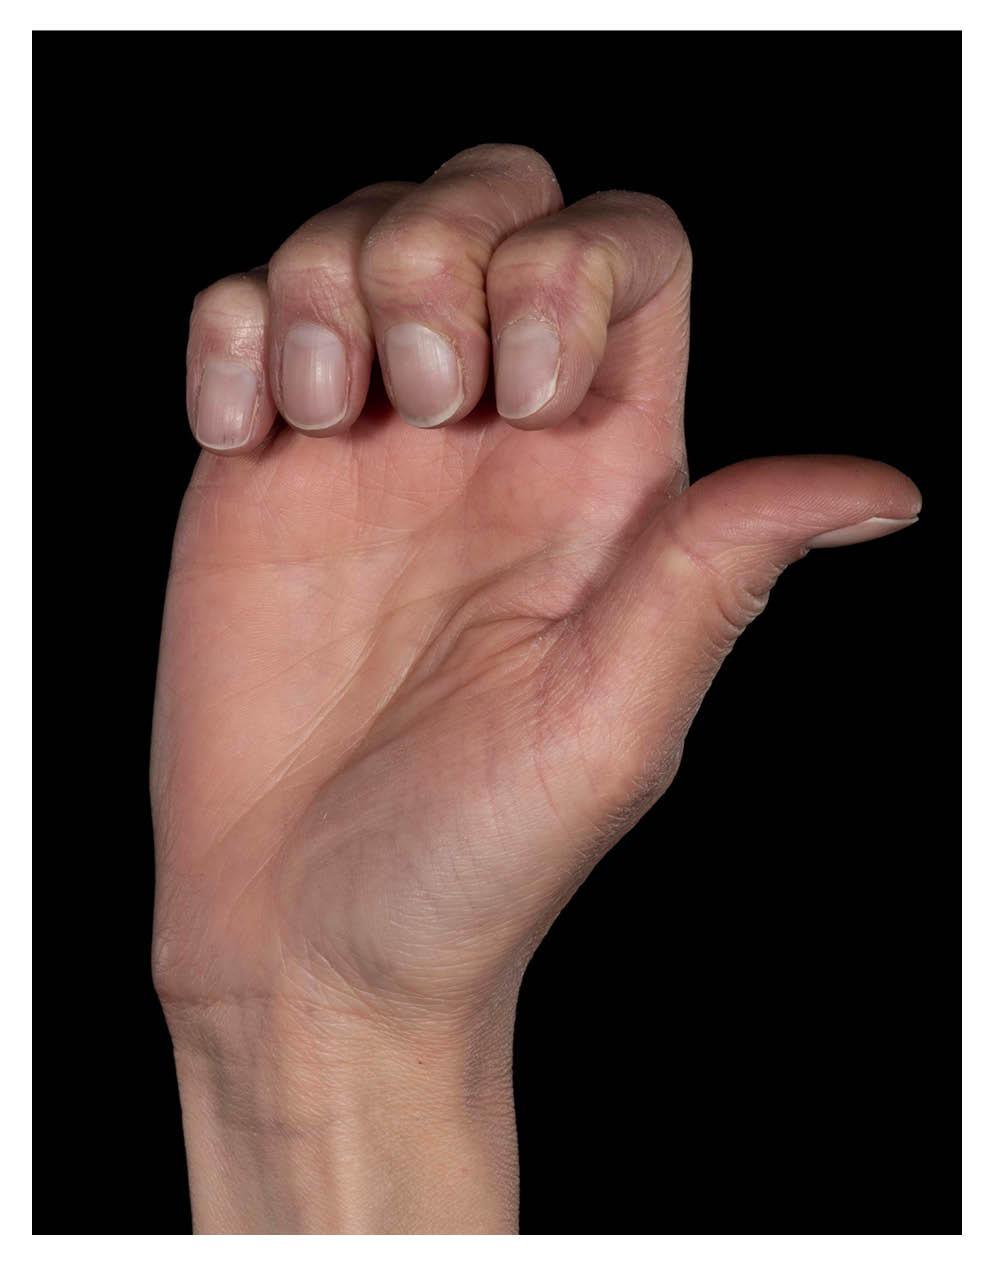 1. Hook grip. Bend top two joints of each finger using your own muscle power.
 -
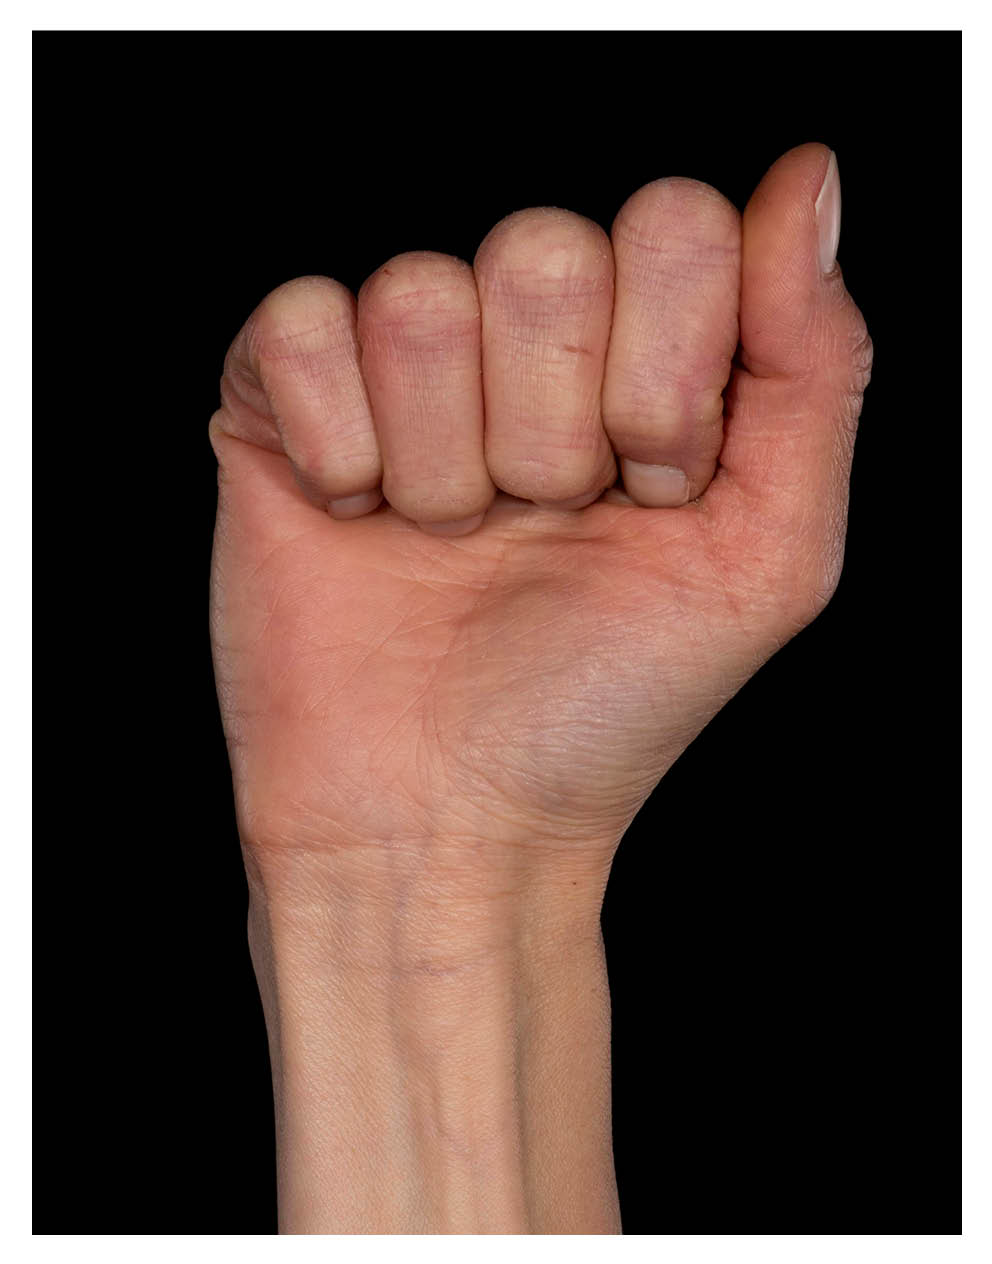 2. Full fist. Bend all joints of your fingers using your own muscle power.
 -
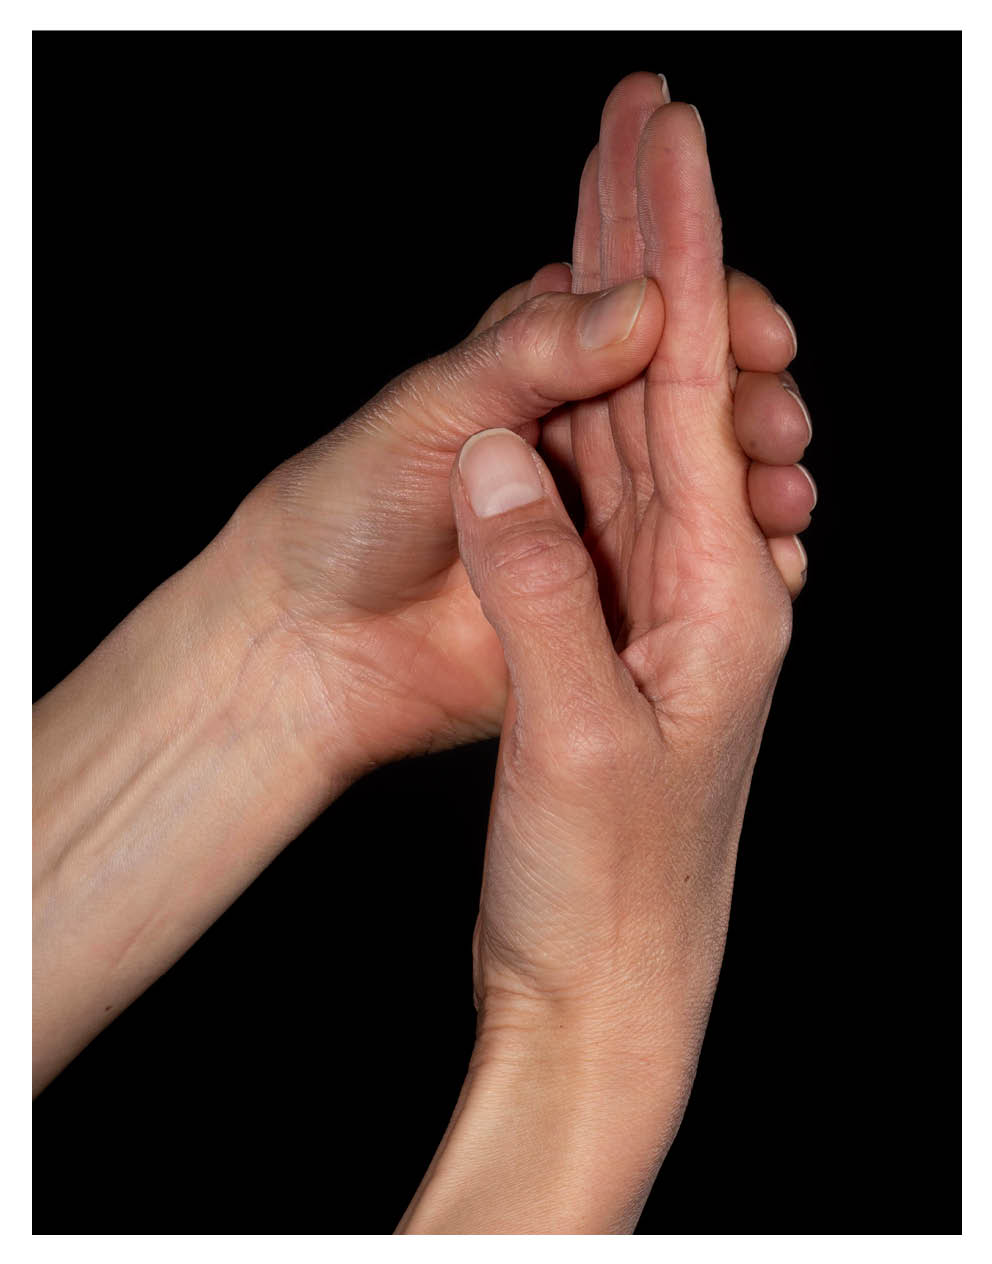 3. Block under the top joint of your finger. Do this by holding the middle joint with your other hand.
 -
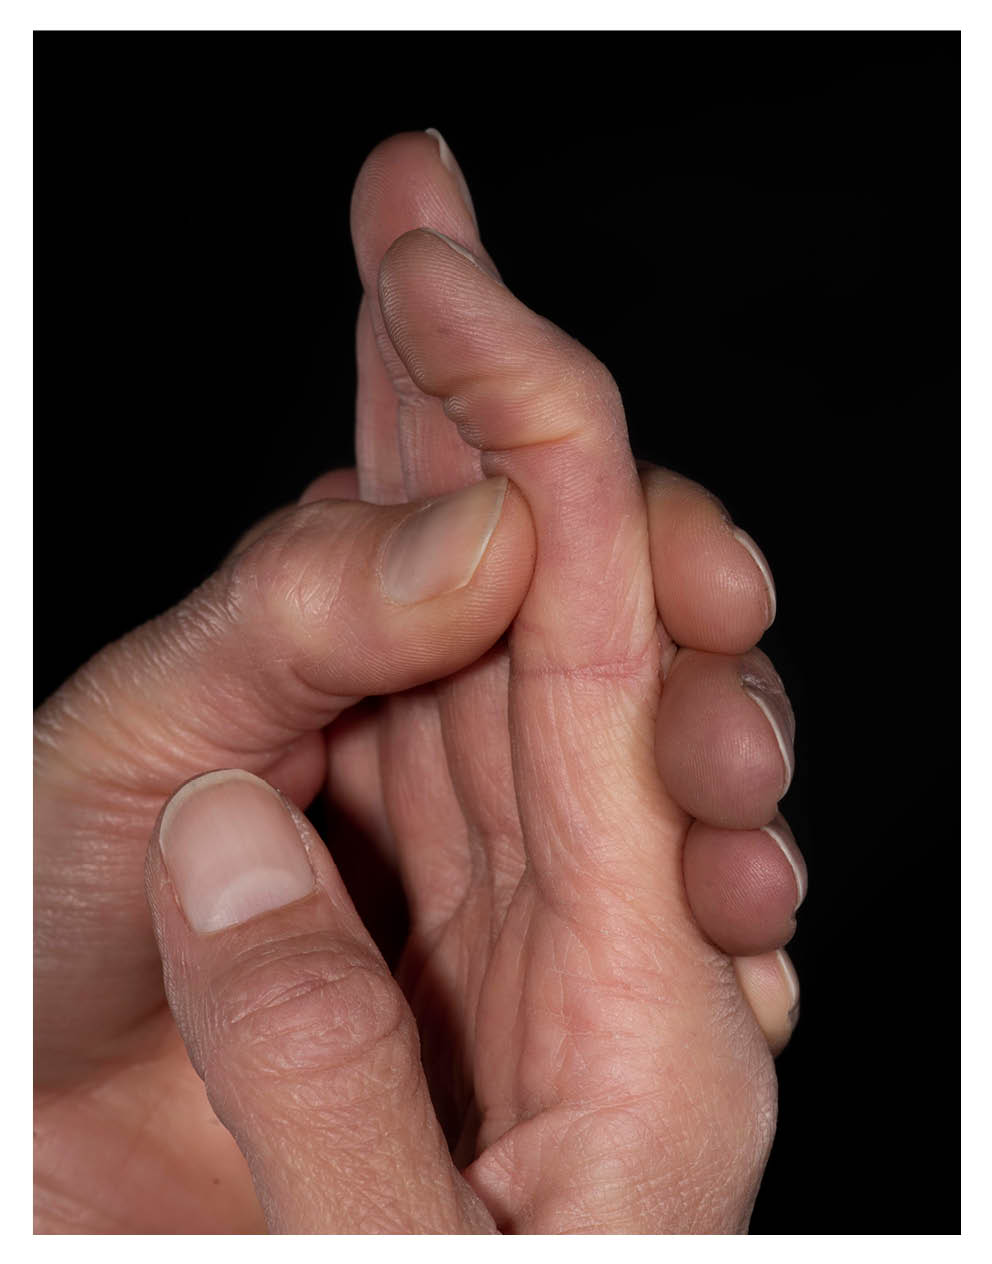 4. Using your own muscle power, bend the tip of your finger. Hold for two seconds and then fully straighten the tip. Hold the middle joint firmly throughout to keep it as straight as possible.
Do not force your finger to bend.
Do not use your other hand to push it down.
Continue to wear your splint for a further two weeks at night in bed and ‘at risk’ times during the day, unless told otherwise by your therapist or doctor.
It can take a few months to regain good movement again in your finger tip. It is important to be patient with your recovery.
If you have any problems regaining the movement in your finger tip, please tell your therapist.